What Do You Want To Know About Candle Making?

What Do You Want To Know About Candle Making?
Candle Making Moulds
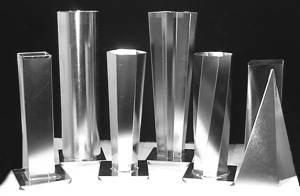
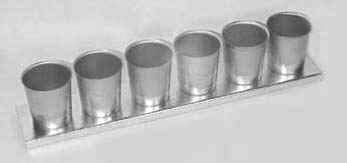
Moulds come in an endless variety of shapes and sizes. Here are four basic types and some home made ideas.


Metal - One piece and easy to use. They have a hole in the base. The wick comes through here. You secure it with a
screw (usually comes with the mould) and seal it from the outside with rubber putty so it doesn't leak wax when you fill
the mould. You can also buy wick plugs to seal this hole in the mould. Tie the other end of the wick to a rod or pencil
and make taut. Rest the rod over the fill-end (top) of the mould. Now the wick is straight, centred and taut. Finished
candles may have one seam to shave off with a knife, then polish with a nylon stocking. There are also seamless metal
moulds available, and multi-wick metal moulds as well.
Two piece plastic moulds. The novelty figurine candles are usually made with this kind of mould. These are more work than the metal moulds because when your candle comes out of the mould there will be a seam running around it that needs to be hand smoothed off. Some pigments stain the plastic, and use of high concentrations of scent oils will damage the plastic making them unusable.
Soft rubber moulds. These are one piece, and easier to use than the two piece rigid plastic moulds. They come in many shapes like the plastic moulds (fruit, figurines, etc.). Cooling wax inside the mould can harden and distort the shape of these sometimes. Most manufacturers recommend that you not use beeswax for rubber moulds because it damages the moulds.
Hard rubber moulds. These are not as long lasting as the other kinds of moulds and can be more expensive. Results are good and they are very easy to use.
 Acrylic and Plexiglass moulds, and Glass Moulds. I have never used this type, but books have indicated
that they are easy to use, and produce excellent quality candles. The bonus here would be that you can
see your candle through them ....good for making candles with pressed flowers or herbs. I have had good
success with just sticking the herbs or flowers on the candle after it comes out of my metal or home
made mould.
Other moulds and containers. 

Wax coated frozen juice cans. Punch a hole for the wick through the metal bottom of the container. Tear the cans away from the hard, finished candles. You can make multiwick candles using these.
Milk cartons . They make nice candles of varying heights. I like a grouping of these large square candles, from 2 cm high to about 150 cm. The cartons just tear away when the candles are hard. You can easily make multi-wick candles using the milk cartons too. I love the patina finish on the candles you get when you use wax lined containers like milk cartons or frozen juice cans. These also make great multi-wick candles.
Canning Jars and baby food jars. Warm the jar before you pour the candle, it will reduce the incidence of bubbles forming, and help the paraffin to adhere to the sides of the jar. Glue the wick (with a wick tab) to the bottom of the jar, then pour your candle. The finished candle looks nice with the lid on and a ribbon around it for a gift. Glue whole spices to the lid for more decoration.
Small paper cups. These work well for the beeswax/paraffin blend. When the candles are hard, just tear away the cups.
Yoghurt containers, plastic margarine containers, wax or foil lined cartons such as hot chocolate mix, frozen juice cans . These recycled materials can make many different sizes of pillar candles and multi-wick candles that will look great in a grouping.
Make your own rubber moulds. Use a two-part compound called RTV silicone rubber. You shape the rubber around a favourite item to have a long-lasting candle mould of that exact shape with no seams.
Terra cotta pots of all shapes and sizes are charming filled with a candle. You seal up the hole in the bottom by lining the inside with a little aluminium foil, and the outside with sealing putty. You can paint the outside of the pot with craft spray paints, or use stencils. Other crafters have found it helpful to seal the pot with non-flammable varnish so the wax and colour doesn't seep into the terra cotta.
Galvanized buckets come in nice small shapes, just perfect for candle making as well. Try making citronella candles left in the buckets for outdoor use. Citronella candle scent is available from candle making or craft supply stores.
Make some 'industrial' or very rustic looking candles using corrugated cardboard. Make a mould from a sheet of cardboard in a cylindrical shape open at both ends for a pillar candle. Set the mould on a paper plate lined with foil. Seal the base by pressing mould sealant putty all around the outside. Spray the inside of the mould and the foil on the bottom of the mould with silicone so you can peel off the card board after the candle hardens. There may be some leakage when you pour the candle, but after a few minutes it will stop as the leaks harden and form a better seal. The candle came out nice and textured from the ribs of the corrugated cardboard after I tore it away. Some of the cardboard will stick to the candle, which enhances the rustic look. Try 1 part beeswax and 3 parts paraffin with ivory colouring.
What Do You Want To Know About Candle Making?